Pages

Showing posts with label Hands-On Science. Show all posts

Tuesday, March 15, 2016

Why It's Time to Make Learning Fun Again


Yesterday afternoon I visited a former student, Tanya. She was in my fifth grade class in 1993. What a joy it was to see her and meet her family. She is tapping maple trees on her property to make syrup. This is something that she learned in my class. We reminisced about all of the things we did in fifth grade. The many field trips, edible wild plants, rockets, and camp
Tanya, who is now a school board member at my former school, is passing this passion for learning and trying new things to her children. Her family also raises beef, chickens and sheep on four acres of land. Tanya’s husband, Dave is a tool and die maker and is adept at fabricating tools. This led us to a discussion about educational philosophy. We discussed how schools have developed a culture of testing and the negative effects on children. We spoke about how learning should be novel, hands-on and authentic and the importance of play and imagination in the learning process. We talked about how maker’s labs can foster that kind of learning. 
Too often as teachers, we are overwhelmed with all of the things that we have to get done in our classrooms and it is difficult to step out and develop new things. I want to encourage you as a teacher to put aside the textbook, and engage in something fun and novel for both you and your students. 

Yes, it is scary to step out of your comfort zone, but it is equally rewarding for both you and your students. Will you fail? Yes, you probably will at some aspect of your activity. This is how you learn. Revise what went wrong and then set the activity aside for next year and try a new activity. 
If you set a goal of developing a hands-on activity once a week or even once a month it will make your job a lot more fun and will provide for an enjoyable learning experience for your students. Build your repertoire of activities and soon your classroom will be the talk of the school!  

Thursday, March 3, 2016

Learning Through Play


Do you remember as a child how you would play with your dolls or with your army set? You used your imagination in creating real life scenarios. The concept of using play to learn is key for children to enrich their experiences and make connections with real life. Play is hands on. It requires curiosity and creativity. It is a perfect way to introduce authentic learning to your students.

Often children's museums have miniature sets. You'll find grocery stores, construction sets, play kitchen. Kids love to pretend using real life objects!

You can enrich your students' play in the classroom by using these concepts and integrating your curriculum.

For example, you can use cooking in your classroom to explore measurement, temperature, multiplying (halving, doubling or tripling a recipe!), fractions, portion size, reading a recipe, collaboration, following directions all while enjoying the experience. You don't need a worksheet to explore these concepts!

Taking a step farther, once you have the basic skills involved, students can create their own recipes and alter or tweak the recipe to their taste! This encourages creativity within the boundaries of skills they are learning.

One of our favorite ways to include play in the classroom is by setting up a miniature restaurant. We build a Hamburger Shack and stock it with pretend food items. Then students order from the workers and the workers must fill the order and calculate the cost of the order correctly.

Students hone their skills on charting, adding, using a calculator, making change, and customer service. We have a download available for you to make it easy to give the Hamburger Shack a try in your own classroom!

Tuesday, February 2, 2016

Hydroponics Strike Again!

I'm back in the classroom {greenhouse}!

I've finally graduate middle school...and in my retirement time am volunteering at our local high school ag department. I'm working with the agriculture teacher to start up aquaponics and hydroponics systems in the high school greenhouse.

I have ten students who have volunteered their free periods to work with me on getting these systems up and running.

Here Tyler is preparing the growing bed for the nutrient solution from the tilapia fish.

Our first steps were to obtain industrial bulk containers and cut the tops off to form the bottom tank and the top growing area. We had two of these tanks donated from Honey Acres in Ashippun, Wisconsin. Both will be used for aquaponics where we will grow about 100 tilapia over the next nine months.

I'll have more updates coming! In the meantime, if you want to try hydroponics on a small scale, check out these directions for a simple Windowsill Hydroponics system!

Wednesday, January 27, 2016

All you need is love...

Since my retirement last summer, I've picked up small teaching job and am volunteering at our local high school ag department. This week I met with five students and we have two IBC containers that we're getting aquaponics started in for the semester. If my experience is anything like in the past with aquaponics, that number of interested students will grow quickly!

However, the latest craze we have been exploring are using SMD LEDs to create holiday cards. We created a few for Christmas...but with Valentine's Day on the horizon we wanted to do something a little more impressive {if you're going to give your Valentine something, it's worth the effort to look good, right?!}. Check it out! Our technology experience is growing, too.

We even made a GIF.

For real.


We're getting pretty savvy around here...


To make this card yourself, you can get our step-by-step directions by clicking here, or I can give you a rough breakdown. Basically you need three pieces of paper or cardstock, some SMD LEDs, (we used four in our example), copper tape, a coin battery, and some creativity!

Decorate your paper in any card style you'd like. On one piece, you'll need to decorate the "outside" to make a card, on the other, you'll decorate the "inside" and leave the back side blank. These will be fitted together at the end.

Run your tape to create a parallel circuit. Place your LEDs and battery in place, testing your LEDs as you go along. Take your third piece of paper, cut to fit over the copper wiring. Punch holes on that third piece of paper so that you can see the LEDs. We also cut a heart out of the middle so the lights really shine through! Tape the inside message to the outside message, fold, and send to your love. Full step-by-step directions can be found here.


Apple's Sparkling Heart

Wednesday, July 8, 2015

Windowsill Gardening

Red white and blue for Independence Day!

What a whirlwind. I can't believe that after 39 years I have officially retired from teaching! But don't think that retirement is going to slow me down...In fact I have a host of hands on learning and teaching opportunities already scheduled! The week after school, I taught a three day course to teachers on developing Makers Labs in their schools. We made hands on projects. We visited two Makers Labs in our area. We had fun while learning.

Not sure what a Maker Space or Makers Lab is? Check out our free download that walks you through the philosophy of it.

After this course, these teachers plan to initiate Makers Labs and Maker Spaces in their school buildings.


I also participated in a Fourth of July Celebration for 60 students at a local school to learn about Thomas Jefferson and the tinkering and inventing that he did. Then we made hydroponic planters from deli containers. The kids went crazy over them! I painted theirs red white and blue to fit the theme.


Check out how quickly this lettuce is growing! These photos were taken just one week apart!


Wednesday, November 19, 2014

Freaky Flipping Friday!


Here I am on Freaky Flipping Friday! where we flipped the class and students do a science presentation! These girls enlightened us about the chemistry of an egg white facial (with a bit of yolk!). The egg was on my face and the yolk was on me!

Some of the other presentation topics included Radiation from Hiroshima and how Leukemia was more frequent after the bomb; and a demonstration how to disassemble an iPhone and replace a cracked screen. My eighth grade students are phenomenal this year. They just soak up knowledge and rise to the challenge that they are given. They are curious and creative kids.


Monday, November 17, 2014

Sleep Tech Visits Middle School Science


We are studying the nervous system. We had a Sleep Tech visit and explain how she reads and interprets brain waves and diagnoses sleep disorders. Students volunteered to be hooked up as if they were receiving a sleep study.

The classes realized the importance of sleep and being able to function at the highest levels of physical and mental states. And also how the lack of sleep plays an important role in creating diseases within people.


Sunday, November 16, 2014

Every Classroom - A Makers Space

What can you do with plastic bag ropes? Why not make a bridge!


I taught a Makers Space workshop yesterday to introduce the Maker Space concept to interested teachers. I led with a powerpoint presentation on the importance of hands-on learning and creative thought. We viewed TED Talks by Sir Ken Robinson and Gever Tulley

I led the teachers on a tour through our own Makers Lab and gave them some practice in hands-on learning in just a few of the areas that we do in our Makers Lab. I had the following stations for the teachers to tinker in:
  • Copper tape circuits
  • Foam cutting
  • Soldering
  • Spaghetti bridges
  • LEGO EV3
  • Brushbots
  • Truss bridges
  • Reverse engineering
  • Snap circuits
  • Sphero
  • Plastic bag ropes
  • Hacking an old computer
I also sent the teachers home with a CD packed full of some of our most popular products on Teachers Pay Teachers to help them get their own Makers Space running.

Are you interested in creating a Makers Space in your classroom? Check out our free resource to help you get started! 

Tuesday, November 11, 2014

Aquaponics in Makers Lab - We've Got FISH!

We started lettuce and spinach just over two weeks ago. We have micro-greens ordered. When we see some growth, I'll get some photos posted!

Our other big news is that last Tuesday we picked up our tilapia fish for our aquaponics set up. We started with 44 fish this year. At the moment, we've only lost one!

Last year a week into our introduction, we had lost about 10 fish. We've made improvements this time around to prevent the losses we initially had last year.

Once of the changes is that we cycled the water longer with ammonia this year. I also think the clay pellets had old bacteria still embedded. When we brought the system up, I believe that the bacteria rejuvenated and is managing to break down the ammonia better.


We also had an great Makers Lab moment, which you can see in this photo (the fish are too tiny to capture a good photo right now, but this is the day we put them in!). We were having an evaporation issue and we need to add water every day. Our aquaponics system is on the opposite side of the classroom from our sink. We were running a hose across the floor (tripping hazard), rolling and unrolling hose each day (time consuming), and when we rolled hose there almost always was water spilled across the floor.

With a little finagling, we ran the hose up through the drop tiled ceiling and across the room. Now the hose stays in place, we save time, and have a safer and cleaner Makers Lab! 

Saturday, November 8, 2014

Makers Space Tour - Illinois Children Museums


Last weekend we took a mini family vacation to Moline, Illinois. Our grandkids are crazy about John Deere and it's the perfect place to take them for big JOHN DEERE fun!

While in the Quad Cities, we visited the Family Museum a small, but fantastic place for children to learn through play. I combed for ideas for organizing our Makers Lab while we were there!

The Family Museum in Bettendorf, Iowa had an elegant way to lay out their workbenches where children could come in and build from materials that were provided. Just look at these work sites! They even have multiple heights to accommodate various heights of kids.

This museum was geared toward younger kids, which we witnessed with our younger grandchildren (those under 5) feeling right at home. The older two kids, 6 and 11, still had a good time and were able to make and create.


Our second museum stop was a detour on our way home. We stopped at the Discovery Center Museum in Rockford, Illinois which was amazing! We were visiting over Halloween weekend so we were lucky to participate in a Pumpkin Chuckin' special event where kids launched pumpkins using a large and a small scale trebuchet. Inside the museum, we couldn't get the kids out! This time we only had our two older grandkids, the rest had headed home. The older ones enjoyed themselves and I think our younger ones would have had just as much fun.


There were great opportunities for the kids to create and make. Our two kids designed their own woodworking projects and built upon their skills.

The following two photos are some of the items on display. The atmosphere was inspiring.


I saw some wonderful examples of organizing and establishing the Makers Lab that I couldn't help but comb for our Makers Lab. Check out the materials storage below. These are 3 and 5 gallon buckets set into crafted plywood shelving units. Holes are cut into the plywood and the buckets rest neatly inside. Duct tape in colorful patterns is placed across the bottom one-third of the buckets to help keep items contained. For any of you in a Makers Lab or Makers Space, you can imagine what this collection can bring to the chaos that is a Makers Space!


These are larger cardboard barrels with various pieces of wood, styrofoam, cardboard, plastic... essentially junk! But this junk can be treasure when sorted and stored so children can easily begin imagining and creating. And when the time is up, it's easy for the kids to sort their items back out.


If you're looking a creative way to spend an afternoon in the Midwest, I'd recommend both the Family Museum in the Quad Cities area and the Discovery Center in Rockford, Illinois. Your kids will thank you for it...and you'll probably have fun too!

Wednesday, October 29, 2014

Makers Lab: Programming and Coding

During my visit last week to the Makers Lab, it was loud! Kids were using hand tools and power tools. They were collaborating. There was no shortage of noise and activity. In the adjoining room, I notice two students sitting quietly with an iPad and a MacBook, in complete contrast to the power tools revving on the other side of the room. 


Tyler shared his project with me. He was busy writing code for the video game, Minecraft. While I talked with him, he was trying to make the menu page more visually appealing. His first round of code, “made the menu a little jumbled up.” 

By the end of the Lab, he was moving on from the menu to creating a special Christmas version. When he is ready, he plans to move on from Minecraft to working on web pages and apps.


This demonstrated to me the diversity that a Makers Lab allows. As some students thrive in group environments, others are more introverted and work well on their own. I am so impressed with the ability of these students to dive into a project with focus and drive because they are curious and want to know more. What a triumph for a teacher to educate without force and pressure. To allow a student to express himself through a project. To create an environment with no limits.

I wish for that in all schools. I wish for students to be allowed to be curious and inventive. To generate their own successes from their own trials and errors. To love learning and solving problems. To become so engrossed that they forget that they are learning.

Tuesday, October 28, 2014

Makers Lab: Scale Model Railway and Local Community


When students in the Makers Lab are at a break in their own projects, they have a group project that they can work on. The class is making a replica of the surrounding landscape, roads, and railways on a scale train table. The train table is in the early stages. We believe that learning should be hands on and applicable to real life

The students had mapped out the local area and were beginning to make scenery using plants cut from their school prairie. Near the end of the class, Mr. Hoefs was showing them the next step: creating the Kettle Moraine glacier formations that make their local community unique in Southern Wisconsin. These glacial formations allow for stunning, albeit roller coaster-like, driving conditions during all seasons. In the coming classes, the students will begin forming these hills and valleys and the switchback main highway that runs through the stunning landscape.


Monday, October 27, 2014

Life as a Middle School Science Teacher

Eating lunch. 
I recently made a trip to Jerry's school to snap some of the progress in the Makers Lab (just scroll through some of our most recent posts for details on doghouses, coding, magnetic soccer, aquaponics, submarines/underwater ROV, a car...and more). Finn and I arrived early so that we wouldn't miss a minute of the kids Making in the Makers Lab. Jerry was eating a quick lunch as we arrived and we headed to the middle school science classroom.

We were greeted by a handful of boys and one girl eating their lunch at the desks in the science room. 

These kids choose to eat their lunch in Mr. Hoefs' room. 

They want to be there.

Do you get what I'm saying?

Middle school students. Want. To. Hang. Out. With. A. TEACHER.

WHEN THEY DON'T HAVE TO!!!!!!

These kids were so sweet and friendly. They were extra nice to Finn. They chatted with me. They were not like the middle school kids I remember. 

I was impressed.

Then as a bell rang, kids hustled in and out and poked fun at Mr. Hoefs for who knows what. And we rushed down the hall to the Makers Lab.
Middle school students stopped by to discuss the fire safety play that they wrote and were scheduled to perform for the elementary school students.

I don't know how my dad does it. But I'm glad he does. These kids deserve good teachers. They deserve good schools. 

All kids deserve good teachers and good schools. 

That's why I'm here writing this blog with my dad (Jerry, or Mr. Hoefs as he's commonly referred to). I want all kids to have the opportunities that these students are getting. To enjoy learning. To have fun and smile in a classroom. I ache for our kids to be curious and creative. I wish for them to learn without even realizing that they are learning. I want them to understand that life is so much more than standardized tests and results. Life is about trying and failing and trying again. Life is not all seriousness and responsibility but about finding some small enjoyment in the challenge before you. 

I think these kids are learning that.

Not sure what's going on here, but pretty sure they were teasing Mr. Hoefs!
Seriously. We had so much fun during our visit to middle school science.
 
One of the many signs in Mr. Hoefs' middle school science classroom. Good thing the message is so good or I'd have to make them prettier with a little graphic design!

Makers Lab: 3D Hologram Creation


Quiet and unassuming. I initially thought that Alex was avoiding me. I sat down next to him and asked him about his project. He's creating a 3D hologram. The day I visited, he was waiting on a shipment of glass that is thinner to arrive. But he was happy to show me his prototype that he has designed.

He has carefully drawn his pattern on the sheet of thicker and cumbersome glass. He showed me how he plans to us a glass cutting tool and then create a pyramid from the pieces. Once his pyramid is complete, he will create an iPad stand to shine the image from the top of the pyramid. The image will be, “cut into four pieces which will create the hologram,” as Alex explained to me.

I am astounded by these students. I am in awe. Each student is driven by a different motive. A different perspective. A different interest. But they are all equally enthused. It made me want to go back to school so that I could tinker and make right along with them.

Thursday, October 23, 2014

Makers Lab: A Doghouse for Lexi the Weimaraner

One of the first projects I noticed as I walked into the Makers Lab was a team of three boys, Cole, Connor and Mack. What stood out to me was their focus. Quite frankly, I remember middle school kids being flight at best. These kids got right down to business and worked for 45 minutes straight without goofing around, without whining, without acting out. I was impressed.

Connor, Cole and Mack are working on building a dog house for Connor’s weimaraner, Lexi. The dog house is designed to channel rain water from the roof into a water dish.

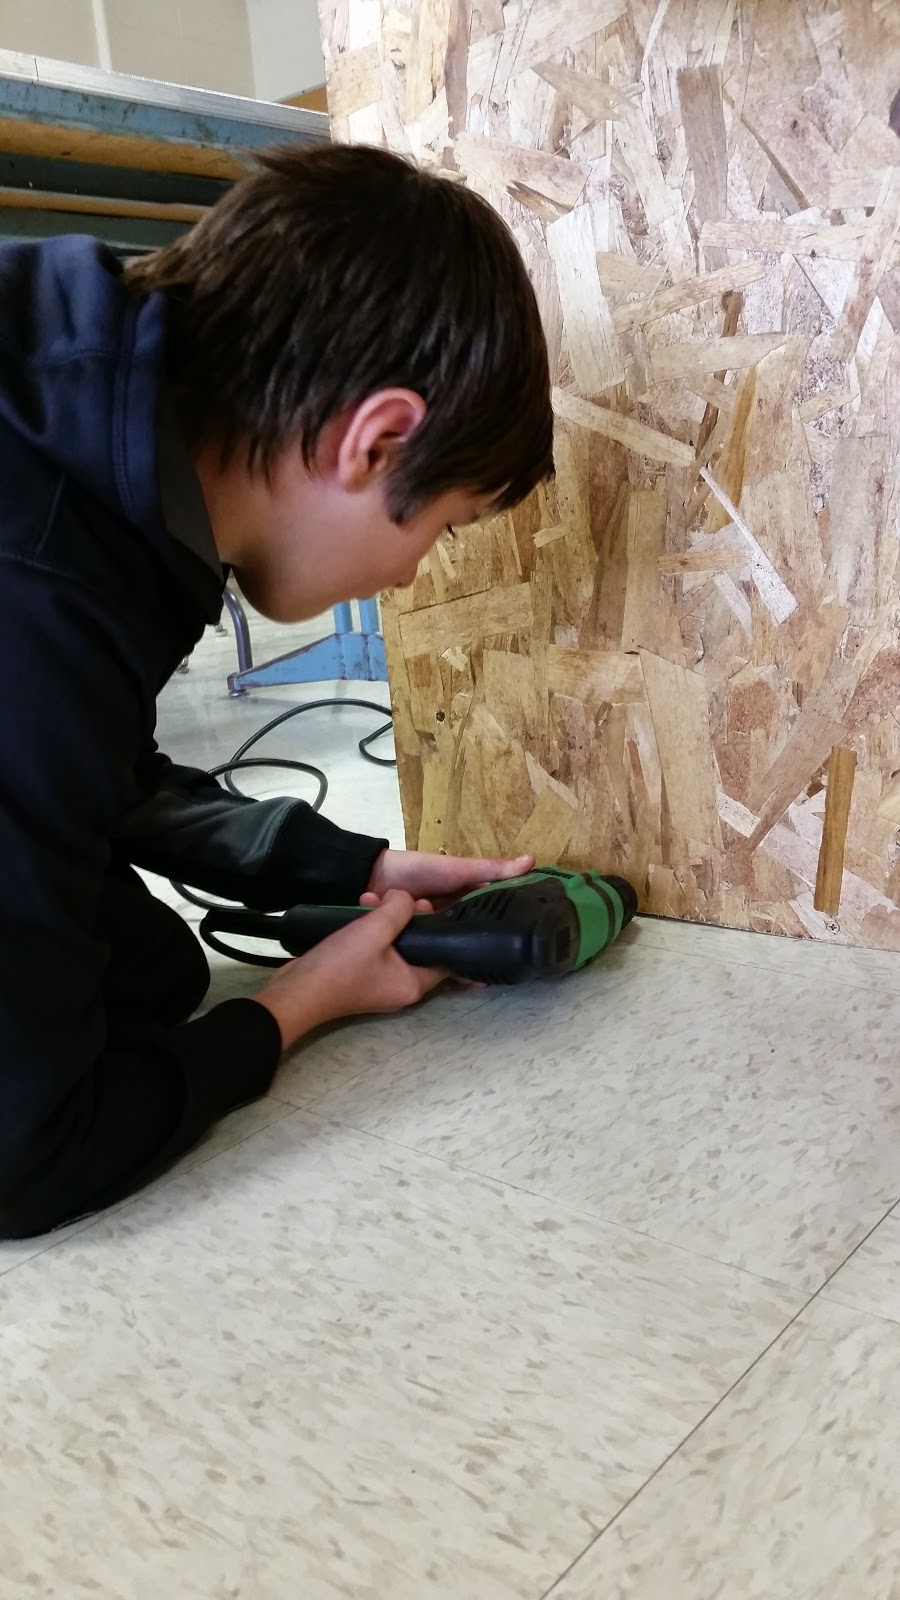
“We brainstormed and to solve a problem, we’re giving a dog water!” exclaimed Cole as he took a break from removing screws with a power drill. 

Their actual design wasn't matching up with their hand-drawn blueprints. They had to undo some work from their previous class. It’s all part of the learning process. It's all part of the hands-on learning in the Makers Lab. 


Underwater ROV in the Makers Lab


During my visit to the Makers Lab, Allie and Alyssa took a break from scenery creation on the train table (more to come on that in another post!) to show me their underwater submarine prototype. It’s a propeller-driven model that they created from a plastic coat-hanger, weights, electrical tape, a motor, wires and some C batteries.
Waterproofed motor
“We hot glued around the motor to cover the holes and then wrapped it with electrical tape to waterproof it,” Alyssa explained. 

They are waiting on a kit to arrive in the mail. Allie and Alyssa priced out the separate pieces of their final submarine, but found that purchasing the kit that the company offered would cost less because of the sales tax on each piece purchased separately. 

When their kit is complete, they will launch their underwater ROV in the local lake with a waterproofed camera to survey the bottom. They demonstrated their prototype in the aquaponics tub for me. Might as well put that tank to use while waiting for the water to balance so that they can add tilapia fish!


A & A demonstrating their submarine prototype.


Going for a swim!

The motor runs a propeller that moves the ROV.

Wednesday, October 22, 2014

2014 Aquaponics in the Makers Lab


The Makers Lab is running full speed! I stopped in to photograph a few of the projects and I was so excited to see all the happenings. I was blown away by the focus and dedication of the students as they spend 45 minutes buzzing around the Makers Lab. The upcoming posts will highlight each of the projects.

More compact than last year!
One of the first things I noticed when I walked in the Makers Lab was the the aquaponics lab is built! It is significantly more compact than last year's model. At the top, the plants will grow. The water in the tank is pumping and you can see how it is aerated using the PVC piping with holes drilled in it. Adding the tilapia fish will is the next step!
Aerating the water.


The grow bed where our plants will be placed.